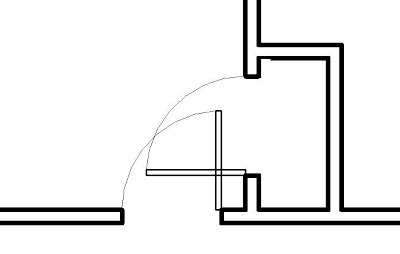
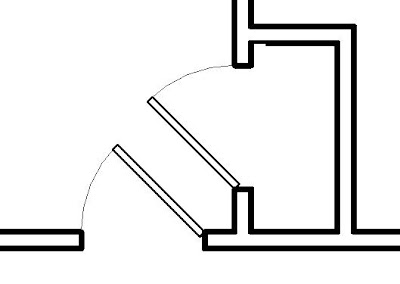
Revit comes with many types of doors that can be used in your projects. You can also download additional types from sites like Revit City and BIM World. Searching through these libraries, I relealized that none of them came with the ability to adjust the swing from 90 degrees to 45 degrees. This is a must in situations as shown below.
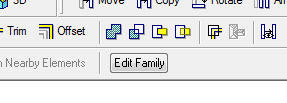
 Modifying the plan swing of doors is a simple process, as long as you understand a few things. You will need to open the door family that you want to modify by highlighting the door in your project and then picking the Edit Family button on the Options bar.
This will open up the door family in a Family Editor mode. You will then need to navigate Project Browser to open the floor plan view of the door.


Modifying the plan swing of doors is a simple process, as long as you understand a few things. You will need to open the door family that you want to modify by highlighting the door in your project and then picking the Edit Family button on the Options bar. This will open up the door family in a Family Editor mode. You will then need to navigate Project Browser to open the floor plan view of the door.
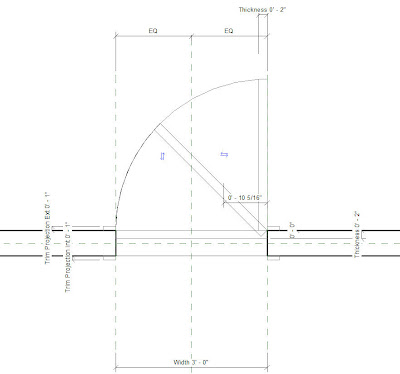
Revit uses Symbolic Lines to represent the swing and the door panel in plan views. The actual 3D door panel is not visible in the plan view because we typically want the door panel to be closed in a 3D view or elevation, and we want the door panel to be open in plan views.
To add additional swing angles, simply copy the existing door panel to the desired swing angle. I used the Rotate command with the Copy Option check so it would rotate and copy the panel in one step. Then you will need to copy the swing arc and trim it with the new door panel.
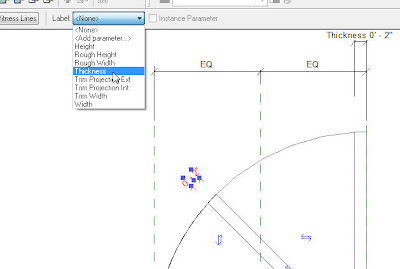
The thickness of the door panel is set to a thickness parameter that users can change. You will need to add a new dimension to the new door panel. Once this dimension is added, assign it to the thickness parameter by using the Label drop down bar on the Options bar.
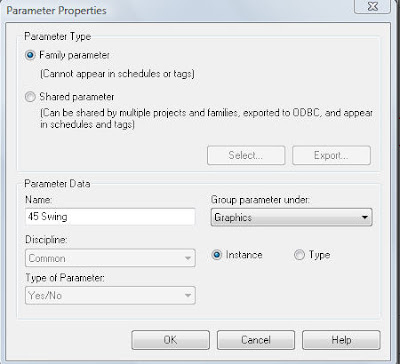
The last step is to set the visibility parameters to allow one swing to be visible and the other swing to be hidden. To do this, you will need to highlight one panel and the corresponding swing arc. Once highlighted, go into the Properties and select the small box at the end of the Visible check box.
This will allow you to set the visibility to a parameter that users can control inside of their projects. Add a new parameter. Provide a name for the parameter that relates to the swing angle. Make the parameter an instant parameter so users can control this instantly as opposed to by type. Choose the group to place this parameter under. Repeat this process for the other door panel and swing arc. In the end, you should have one door panel and swing arc set to one visibility parameter, and the other door panel and swing arc set to another visibility parameter.
Load this door back into your project or save it to your library. Now when you select this door inside of your project, you will have the ability to check the box to show which swing you want to view. The end result is a plan that does not have doors swinging into each other.