Schedule Keys are nothing more than a schedule of keys that you can use in other schedules. They are associated to a particular catagory and create a paramater for that catagory that can be used in schedules. There are many instances where these could be beneficial. I will give one example to show you how you can begin to use them in your projects.
Let's say you want to create a typical room finish schedule, but it is early on and you are not sure what the actual finishes will be. You do know what the finish material will be but not the actual color or manufacturer. For example, you want to call out CPT-1, or TILE-1 to call out the material as carpet or tile, but you do not know the particular carpet or tile. I am able to create a schedule key for the types of materials and apply them to my room finish schedule, and fill what the actual keys refer to when that information is known.
Let's begin by creating the schedule key.
I begin by starting a new Schedule by clicking on Schedule/Quanity from the View tab on the Design Bar. I select Rooms as my catagory since I am creating a key for the room finish. I then select to create a Schedule Key as opposed to a Building Component type of schedule. I also fill in the Key Name as Floor Finish. This is the name of the new parameter that will be added to rooms. I select OK to go to the next step.
I begin by starting a new Schedule by clicking on Schedule/Quanity from the View tab on the Design Bar. I select Rooms as my catagory since I am creating a key for the room finish. I then select to create a Schedule Key as opposed to a Building Component type of schedule. I also fill in the Key Name as Floor Finish. This is the name of the new parameter that will be added to rooms. I select OK to go to the next step.
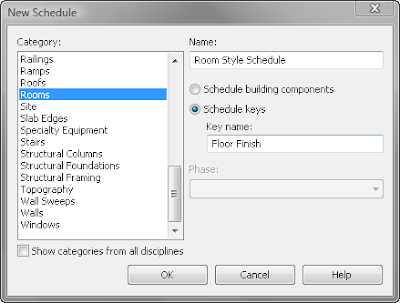
In the Schedule Properties - Fields Tab, the Key Name is added automatically to the Scheduled Fields column. I need to add one additional field for the manufacturer of the finish. I do this by clicking on Add Parameter and fill in the name Floor Manufacturer.
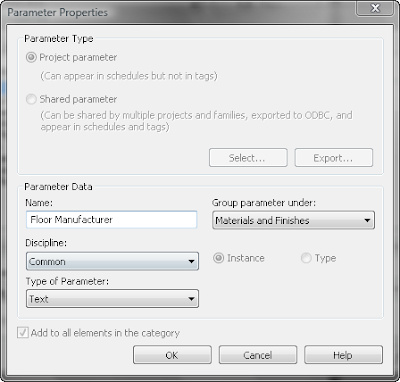
The Key Name and the Floor Manufacturer are the only fields that are needed for the schedule key. Select OK to close the dialog box and to open the schedule key view.
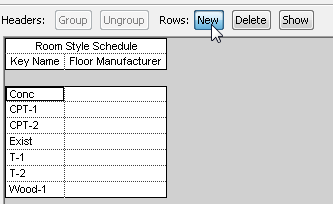
In the schedule key view, you can add new Key Names by clicking the NEW icon on the Options Bar. Create the common finishes that you typically use. Others can be added later, and the manufacturer information can be added at a latter time.
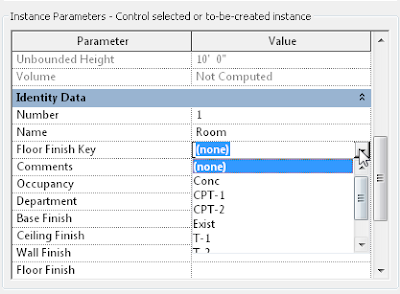
Now when you either go to a Room properties or create a Room Finish Schedule, the Floor Finish key parameter will be listed. You can select what type of floor finish by using the drop down arrow to list the keys that were created in the Schedule Key.
The schedule key can be created in your standard Revit template file and the information can be filled in as it is known. This will create a standard list of finish names to be used in your office.
Schedule Keys are the key to creating consistancy and standards in Revit.
Schedule Keys are the key to creating consistancy and standards in Revit.
11 comments:
Thank you for this explanation!
I'm a Process Designer for a large AEC firm. I'm in the middle of designing our BIM standards and templates. This will really help!
I have to agree. This was just what the BIM doctor ordered.
While this does work great for finishes like the floor or ceiling, which each room only has one of, I am struggling to make this work for my north/south/east/west wall finishes. If I need to create a schedule key for each condition and each finish type (wall-floor-ceiling)then it doesn't seem so great. Any advise?
I've tried schedule keys for finishes like this in the past and was never satisfied. Maybe I should try it again.
On a related note, if you're not using schedule keys and just typing things in these manually entered values are still available through the drop-down list. Only what you have entered is available and if you mistyped you'll see those as well (so CPT-1 and CPT1 will both be visible.
What if you have 4 different floor finishes in one room?
I have the multiple finishes in one room issue as well. AHHHH!
Its simple. Create new key parameters with titles such as:
Floor Accent 1
Floor Accent 2
Wall Finish - North Wall
Wall Finish - East Wall
Wall FInish - South Wall
Wall FInish - West Wall
You can also add new ceilings:
Ceiling Bulkhead Finish
And then add pt-01, pt-02 (paint) or whatever finish you need !
Dear all,
I am trying to make a schedule that can give me number of desks in each room. Can someone help me please.
I would create a Room Schedule and embed a furniture schedule inside of it. In Room Schedules you will see a tab at the end called Embedded Schedules. This will allow you to embed a furniture schedule.
You can create a room schedule that has the room name and number, then embed the furniture schedule that has the Mark, Family, and Count. Tell the embeded schedule not to itemize every instance and to calculate totals for Count in the format tab.
You can play with the formatting to make it look the way you like.
Thank you so much for the answer. However, I don't know why I dont have the option 'embedded schedule' on my tab and that is why I was confused.
Thank you so much again.
The embedded tab only shows up in a "Room" schedule.
Post a Comment