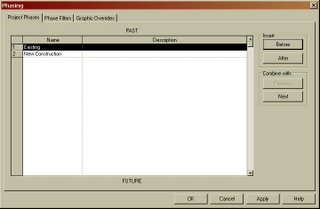
To begin setting up phases, you will find Phasing under the Settings pulldown menu. The dialog box is divided up into tabs. The first tab is where you set up the names of your phases. You will notice that the dialog box has Past on the top and Future on the bottom. It is important to order your phases chronologically. The default template comes with two default phases-- Existing and New Construction. You can rename the defaults or add new phases by clicking on the Before or After buttons in the Insert section.

Most people, including myself, think that Demolition is a phase in a project. With Revit, it is a Phase Status. Let me explain. You could have demolition in any or all phases of your project. It is just part of that particular phase. There are 4 default phase status' that can be used on every phase. You can set items to either Demolished, Existing, New, or Temporary in each phase. The following chart defines each of the phase states.

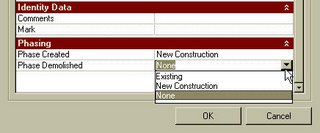
These settings can be applied in the Properties of each item. Simply tell Revit what phase the item is created in and what phase the item will be demolished in.

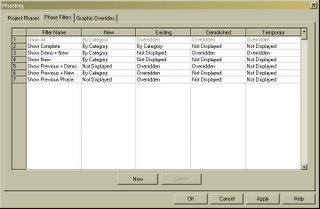
Once you have items set to the correct status, you will need to assign views to show the phase and apply the appropriate phase filter. You can do this in the View Properties.

You can create additional Phase Filters or Override the Graphics in the main Phase dialog box under the Settings pulldown.


I hope this helps expand on what Steve wrote about. Phasing in Revit works well if you understand the concept of phases, phase states, and how to apply them to views.
2 comments:
I want to change my 'new' graphic overide to a solid fill color but any changes I make, have no effect. I can see any changes to existing, demo and temp but not new. Am I missing something?
In the Phase Fileters tab of the Phasing dialog box, you will need to change the filter name for Show New for New from By Category to Overridden.
Post a Comment